How to extract rows based on regular expressions
There are two ways to extract or filter records from excel
using regular expressions.
1.
Using Home->Sort & Filter ->Filter
2.
Using Data->filter->advanced
We have the below excel document and we need to extract the
rows based on name which contains ‘John’.

Approach 1
Step 1: Click Home->Sort
& Filter ->Filter


Write the word that you want to filter with, in this example
it is ‘John’.

The result is as shown below.

If you want to have an AND condition with another field that
can be done by using repeating above for that field.
Below example filter excel based on Country column as well.
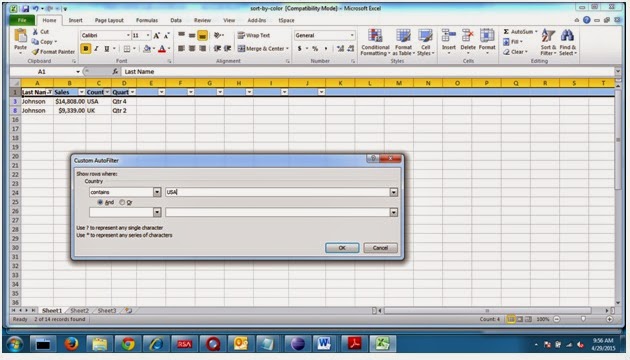
The result is as shown below.

Approach 2
Step1: Create an entry as shown below
at column I (or any empty column) with the column name which you are going to
apply regular expression. Here the column name is ‘Last Name’.

Please note that in column I row 2 need to write the actual
regular expression begin with a single
quote. In this example it is '=*John*. The leading single quote
is important otherwise excel assumes that it is a function.
Step2: Click on the column A row 1 and now go to Data->filter->advanced
on the menu as shown below.

List range below is already populated.
Click on the ‘criteria range ‘and then select column I, row
1 and 2. The field is populated as shown below.

Click OK

If you want to have an AND condition with another field that
can be done by using two criteria range as shown below.


The excel is extracted based on two columns.

Comments
Post a Comment